K8-B-Scroller
Pixels and LED panels from one BeagleBone Black: 8 fused pixel ports, a differential port for 4 more strings, and 3 HUB75 outputs for LED panels.
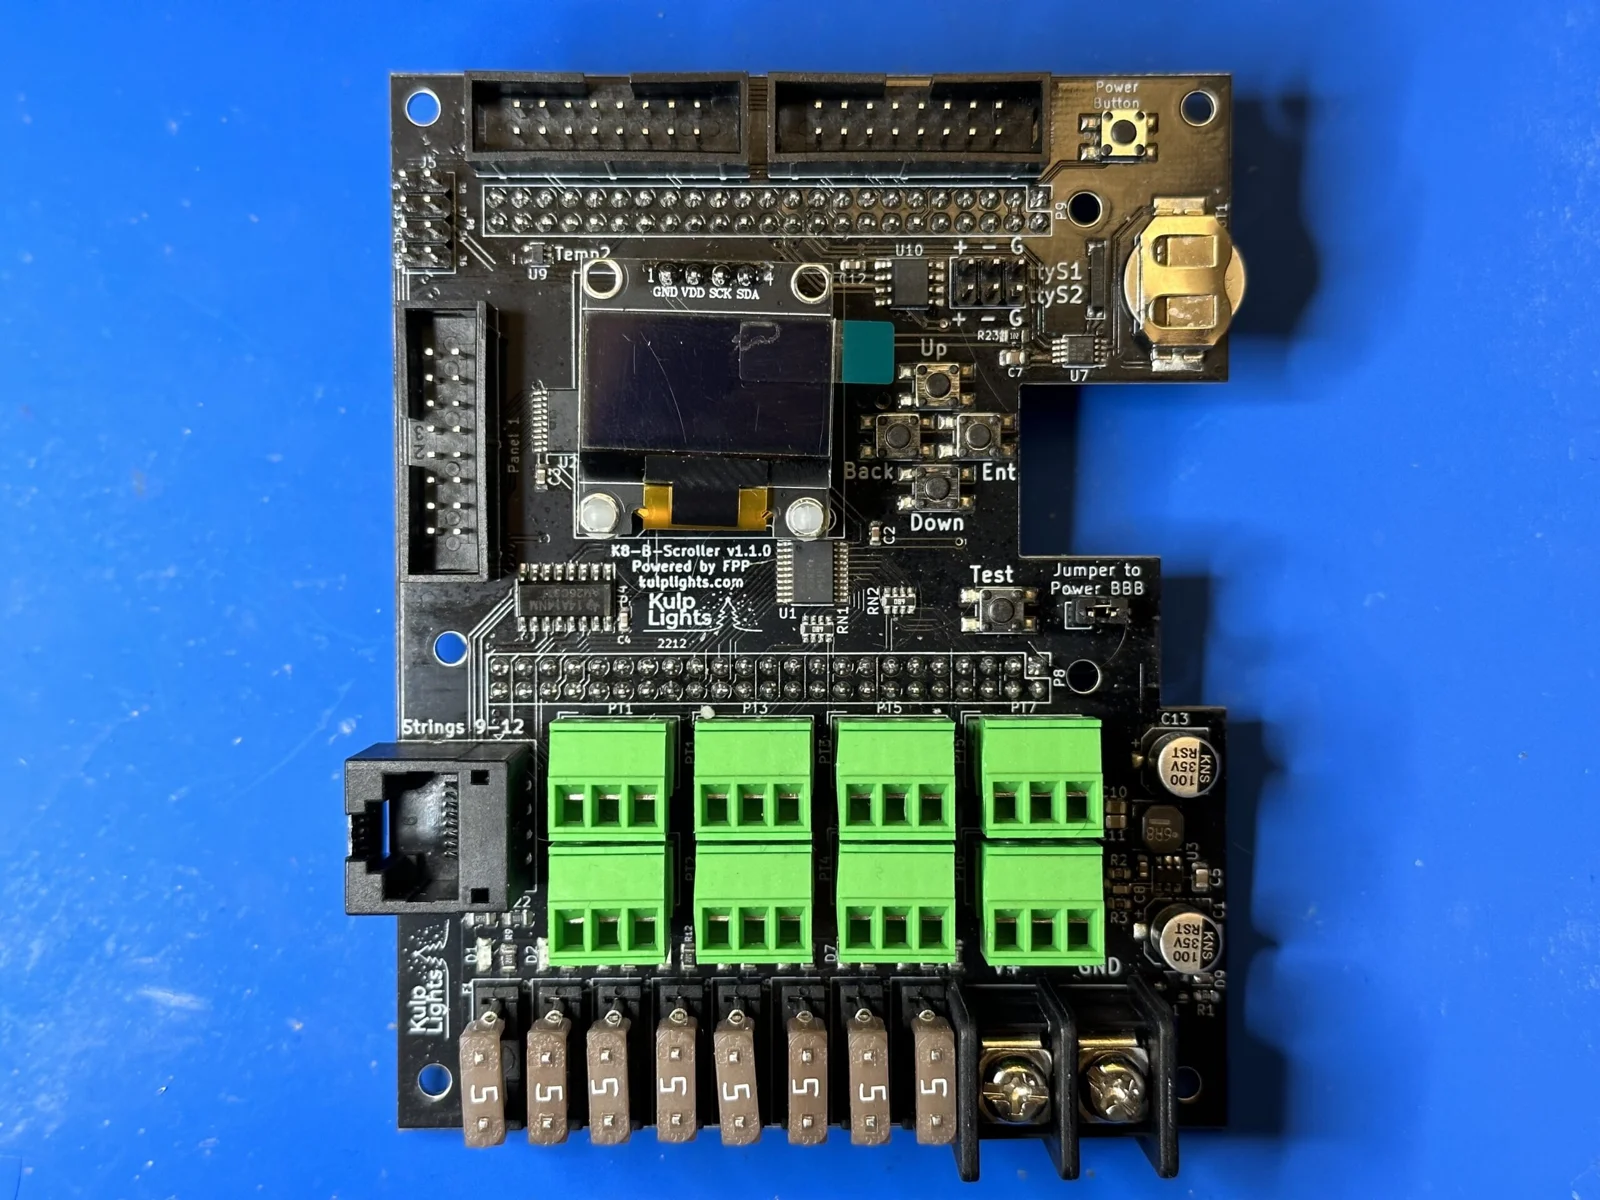
K8-B-Scroller (v1.1.0), shown without a BeagleBone fitted.
This page describes revision v1.1.0 (printed on the board as K8-B-Scroller v1.1.0). See
Board revisions for the earlier v1.0.
How the K8-B-Scroller differs from the other boards
- It needs a BeagleBone Black (or a compatible BeagleBone). See BeagleBone Black.
- One power terminal, 5–18 V. It powers the controller and all eight pixel ports, so all of them run at the same voltage. Don't use 24 V supplies. The panels need their own 5 V supply.
- Mini-blade fuses, not eFuses: no per-port switching or current readings.
- Two DMX outputs on a 6-pin header, not RJ45 jacks.
- The differential port is send-only: smart receivers work in v1, v2 or V4 mode. Falcon V5 receivers work in V4 mode, without status reports.
Specifications
| K8-B-Scroller | |
|---|---|
| Local pixel ports | 8 (PT1–PT8), 3-pin 3.5 mm pluggable, plugs included |
| Port protection | 5 A mini-blade fuse per port, with a fuse-OK LED |
| Differential ports | 1 × RJ45 = 4 strings (9–12), send-only |
| LED panel outputs | 3 × HUB75 (Panel 1–Panel 3), with E line |
| Power input | 1 terminal, 5–18 V DC, powers the controller and all 8 pixel ports |
| DMX / serial | 2, RS-485 transmit, on a 2×3 header (ttyS1, ttyS2) |
| Audio | none built in. Use a USB sound card. |
| Ethernet & USB | the BeagleBone's own |
| Display & buttons | 128×64 OLED, Up / Down / Back / Enter / Test, Power |
| Real-time clock | yes, CR1220 backup cell |
| Temperature sensor | yes |
| Size | 86.4 × 108.9 mm (3.40 × 4.29 in), 7 mounting holes, 3.2 mm |
| FPP output | BBB48String (pixels), LED Panels (panels) |
| Requires | BeagleBone Black or compatible, FPP 9.5 or later |
Board map
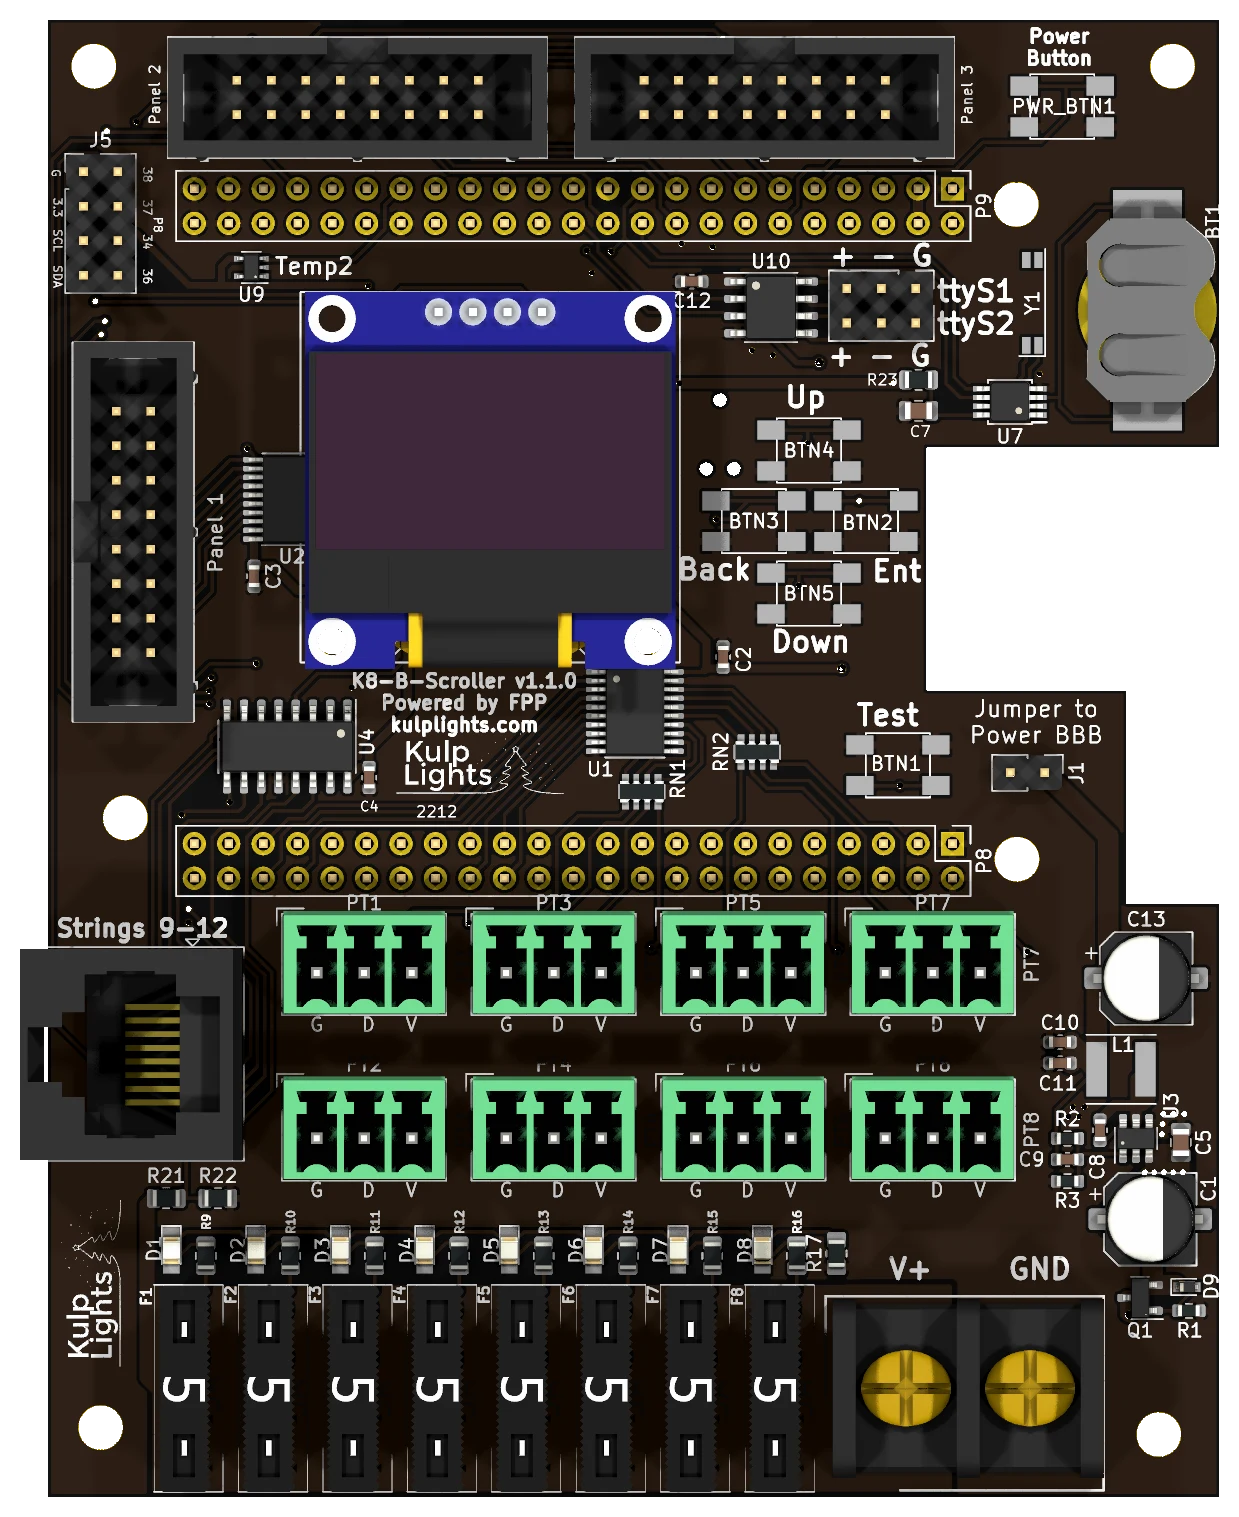
The BeagleBone sits under the upper part of the board, with its Ethernet jack in the notch in the right-hand edge.
Power terminal
The power terminal is at the bottom right, marked V+ (left screw) and GND (right screw). It powers the BeagleBone and all of the logic, and every pixel port. FPP shows its voltage as VIN.
- Because every pixel port shares this supply, all eight local strings must be the same voltage: 5 V or 12 V pixels. To mix voltages, put the other strings on a differential receiver, which powers its strings from its own supply.
- 18 V is the maximum. A 24 V supply will damage the board.
- The panels are not powered through the board. Run each panel's power from your 5 V panel supply.
Check polarity before you power up
V+ is the left screw. The BeagleBone and the controller's logic are protected against a reversed supply, but the pixel ports aren't: a reversed supply goes straight through the fuses to every port and to any pixels connected.
See Power for supply sizing and safety.
Powering the BeagleBone: the "Power BBB" jumper
The jumper marked Jumper to Power BBB, to the right of the Test button, connects the board's 5 V regulator to the BeagleBone. It is fitted at the factory, and the BeagleBone then runs from the power terminal. Leave it fitted.
With the jumper removed, the BeagleBone isn't powered by the cape, and needs its own 5 V supply in its barrel jack. That isn't recommended. Never fit the jumper and plug a supply into the BeagleBone's barrel jack at the same time.
Pixel ports and fuses
The eight pixel ports are in two rows above the fuses:
| Top row | PT1 | PT3 | PT5 | PT7 |
| Bottom row | PT2 | PT4 | PT6 | PT8 |
Each port is G D V (ground, data, +V), as printed beneath it. PT1 is FPP port 1, and so on. See Pixel outputs.
Each port has its own 5 A mini-blade fuse, in a row along the bottom edge: F1 on the left for PT1, to F8 for PT8. The small LED above each fuse lights when the fuse is good and the board has power. An unlit LED means a blown or missing fuse.
Differential port
The RJ45 jack on the left-hand edge, marked Strings 9-12, carries strings 9–12. It is send-only.
Any standard differential receiver works, and smart receivers work in v1, v2 or V4 mode (FPP
drives this board with its BBB48String output). Falcon V5 receivers also work, set to V4, but
they can't send status back. See Differential ports.
Panel outputs
The three HUB75 outputs are marked Panel 1 (on the left-hand edge) and Panel 2 and Panel 3 (along the top edge, left to right). Each is a standard HUB75 connector:
| Pin | Signal | Pin | Signal |
|---|---|---|---|
| 1 | R1 | 2 | G1 |
| 3 | B1 | 4 | GND |
| 5 | R2 | 6 | G2 |
| 7 | B2 | 8 | E |
| 9 | A | 10 | B |
| 11 | C | 12 | D |
| 13 | CLK | 14 | LAT |
| 15 | OE | 16 | GND |
- The E line is wired, so 1/32-scan panels (such as 64×64) work.
- Use the ribbon cables that come with your panels. The red stripe goes to pin 1 (marked on the header's shroud).
- Each output drives up to about 5 P5 (64×32) or 10 P10 (32×16) panels: 15 P5 or 30 P10 panels in all. The refresh rate depends on the longest chain, so spread the panels evenly.
DMX
The two DMX outputs share one 2×3 header, left of the battery holder, marked ttyS1 (top row) and
ttyS2 (bottom row):
| Row | + (left) |
- (middle) |
G (right) |
|---|---|---|---|
top: ttyS1 |
Data + | Data − | Ground |
bottom: ttyS2 |
Data + | Data − | Ground |
Wire + to XLR pin 3, − to pin 2 and G to pin 1 (or to an RJ45 DMX connector). The outputs are transmit-only and can also drive Renard, LOR or Pixelnet through a suitable adapter. See DMX / serial.
Other connectors
| Connector | Marking | Details |
|---|---|---|
| OLED | GND VDD SCK SDA |
Controls & display |
| Buttons | Up Down Back Ent, Test |
the four menu buttons, with a separate Test button below them. Controls & display |
| Power button | Power Button |
top right corner. Shuts down or restarts the BeagleBone; see Power button. |
| GPIO / I²C | G 3.3 SCL SDA, P8 38 37 34 36 |
2×4 header, top left corner: 3.3 V, GND, the I²C bus and four BeagleBone pins (P8-34, P8-36, P8-37, P8-38), for extra I²C sensors or buttons to ground. 3.3 V only. |
| RTC battery | coin-cell holder, right edge | Clock |
FPP setup
When FPP detects the K8-B-Scroller it sets itself up automatically:
- The K8-B-Scroller pixel-string layout (FPP's BBB48String output), with 12 strings of 100 pixels.
- An LED Panels output with one 64×32 panel on Panel 1.
- The voltage and temperature sensors, and two disabled DMX outputs on
ttyS1andttyS2.
Both outputs start at channel 1, so set the start channels so the strings and the panels don't overlap. Set the panel size, layout and colour depth under Input/Output Setup → Channel Outputs → LED Panels; see LED panel matrices in the FPP manual. For the pixel strings see Configuring outputs.
Board revisions
| Revision | Changes |
|---|---|
| v1.0 | Two power terminals: Pixel Power for the pixel ports, and a separate BBB 5V terminal for a 5 V supply that powers the BeagleBone. |
| v1.1 | One power terminal for everything, with a 5 V regulator on the board and the Power BBB jumper. |
Dimensions & mounting
- 86.36 × 108.86 mm (3.40 × 4.29 in), 7 plated mounting holes, 3.2 mm, for M3 (or #4) screws and standoffs.
- The BeagleBone hangs underneath the board, so the standoffs in the corner holes must be tall enough to clear it and its connectors.