PocketBeagle 2
Every board in this manual is a cape for the BeagleBoard PocketBeagle 2 (PB2). The PB2 is a small computer that runs FPP, and the cape adds the power, outputs and connectors.
PocketBeagle 2 only
These capes do not work with the original PocketBeagle (PocketBeagle 1). The two look alike, but the PocketBeagle 2 has a different processor and pinout. The exceptions are the K4-PB, K40D-PB and PocketScroller v2, which work with either.
Regular or Industrial
Kulp Lights sells the boards with or without a PB2 already fitted:
| PocketBeagle 2 | PocketBeagle 2 Industrial | |
|---|---|---|
| Board colour | black | red |
| Memory | 512 MB | 1 GB |
| Storage | microSD card | 64 GB eMMC with FPP pre-installed, microSD optional |
| Temperature range | commercial | −40 to 85 °C |
| Notes | the usual choice | eMMC is about twice as fast as an SD card. Recommended for outdoor or heavily loaded shows. |
Fitting the PocketBeagle 2
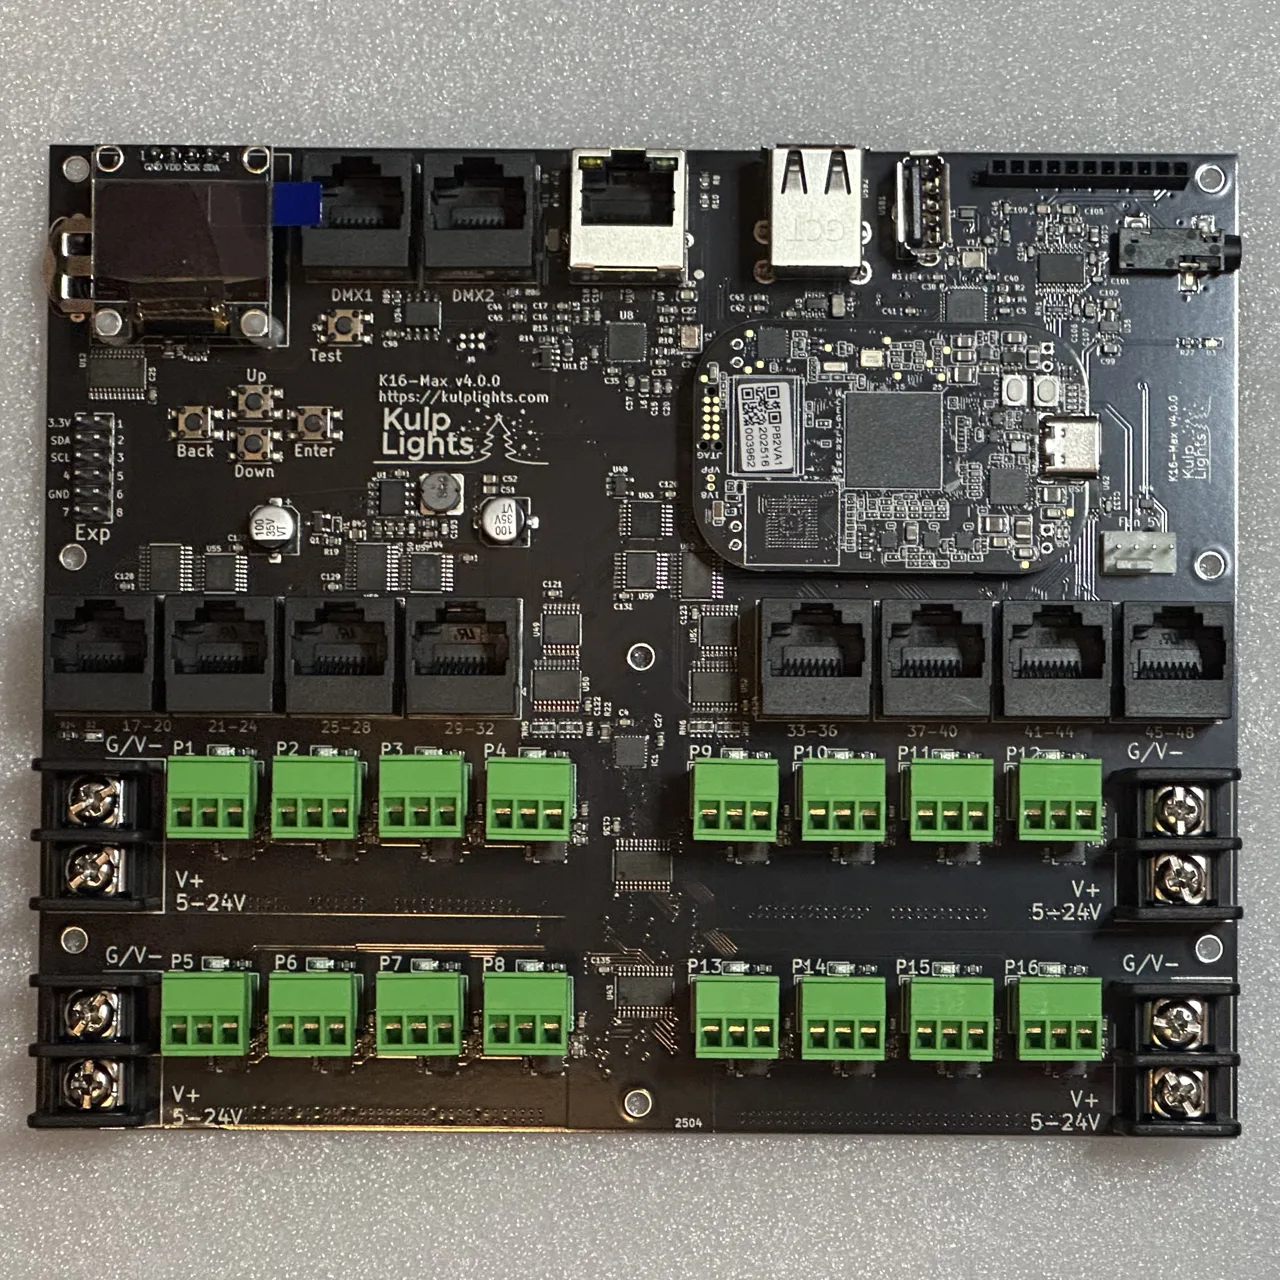
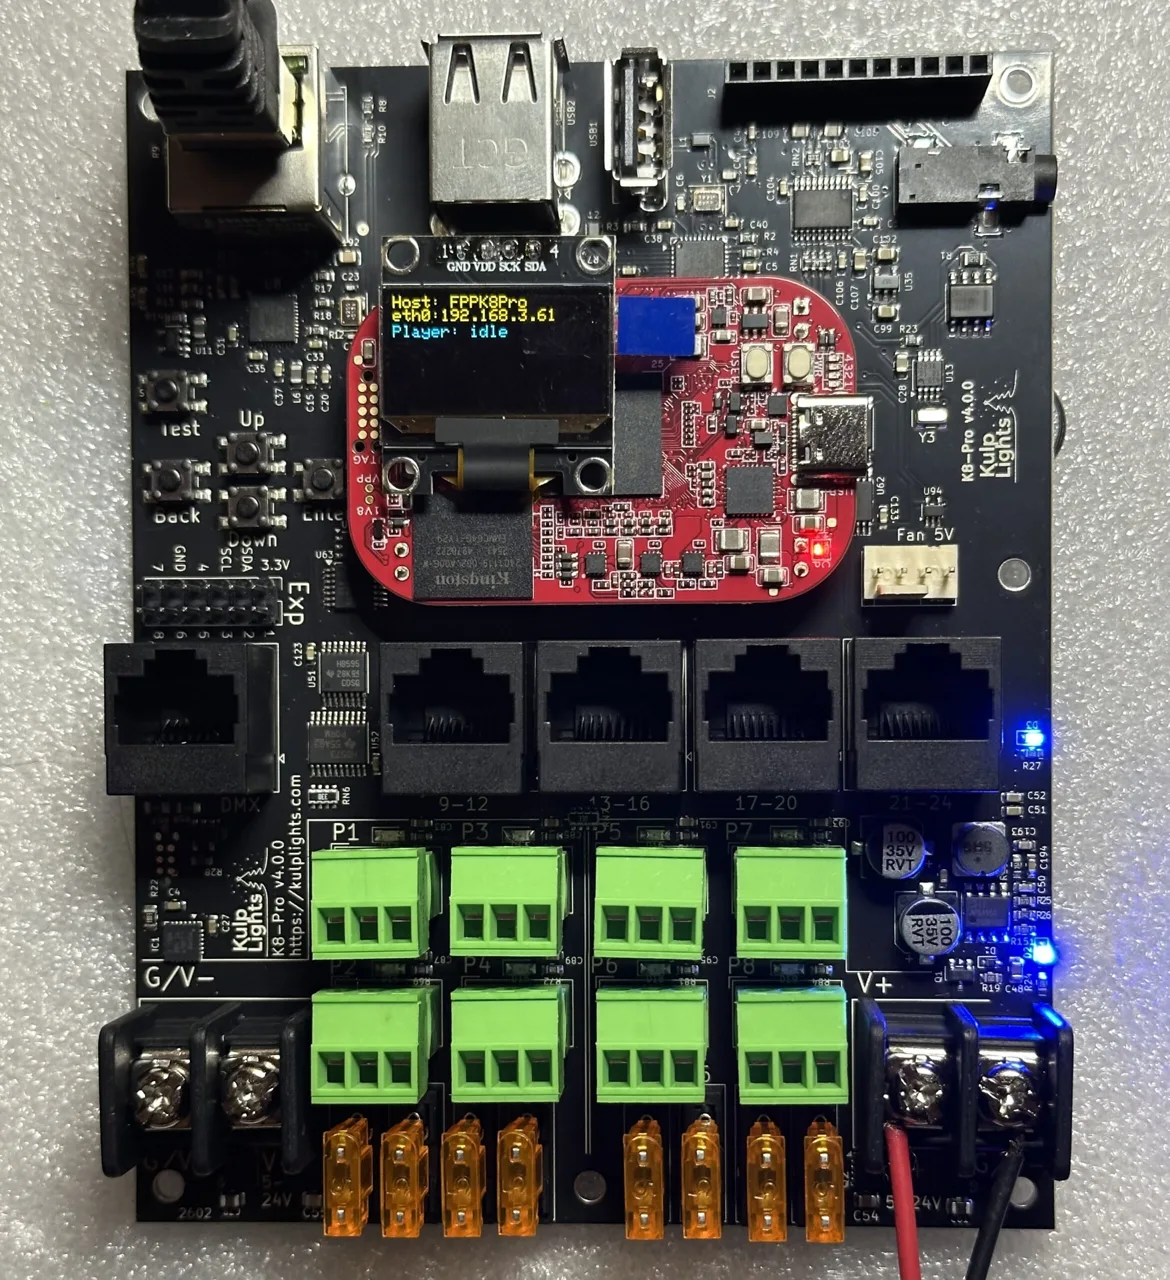
The PocketBeagle 2 fits the same way round on every board in this manual: its USB-C connector faces the right-hand edge of the board, the edge opposite the buttons and the Exp header. Its P1 header goes into the cape socket marked P1 (the one nearer the Ethernet and USB connectors; on the K8-PB, the upper one), and P2 into P2.
If your board came without a PB2 fitted:
- Disconnect all power.
- On the K8 boards the OLED sits over the PocketBeagle. Unplug it from its 4-pin socket first, removing its standoff screws if fitted.
- Hold the PB2 with its USB-C connector toward the right-hand edge, and line its pins up with both sockets.
- Press it down evenly, rocking gently end to end, until it is fully seated. Don't press on the processor.
- Refit the OLED.
Orientation
A PB2 plugged in backwards, or shifted by a row, can be damaged at power-up. Before you power on, check that the USB-C faces the right-hand edge and that no pins are left over at either end.
Storage: SD card or eMMC
- Regular PB2: FPP runs from a microSD card. Use a good-quality card of 16–32 GB (A1/A2, U3). Cheap or counterfeit cards are the most common cause of strange problems. You can buy a card with FPP already installed, or write the PocketBeagle 2 image yourself. See Getting the FPP software.
- PB2 Industrial: FPP is pre-installed on the internal eMMC, so no SD card is needed.
- A microSD extender lets you reach the card slot when the board is in an enclosure.
SD card in a PB2 Industrial
A PB2 Industrial always starts from its eMMC, but the bootloader there checks for a valid SD card first and boots from the card if it finds one. So:
- Don't leave an old FPP card in the slot of an Industrial board. It will boot the card, not the eMMC.
- To run a different FPP version or a clean install for a while, just insert a card with FPP on it. Take the card out to go back to the eMMC.
Re-flashing the eMMC
To put a fresh copy of FPP on the eMMC, for example to start clean or to recover a broken install:
- Write the PocketBeagle 2 FPP image to an SD card. See Getting the FPP software.
- Insert the card and power up. The board boots from the card.
- In FPP, go to Status/Control → FPP Settings → Storage. Under Flash FPP to Another Device,
find the eMMC (
/dev/mmcblk0) and choose:- Create for a clean install. Your media, sequences and settings are left behind.
- Copy to bring your media, sequences and settings along.
- Wait for it to finish. This can take a while. Then power off, remove the SD card, and power up again from the eMMC.
If the board won't boot at all
If the eMMC's bootloader is damaged, the board can't find the SD card on its own. Hold the PocketBeagle 2's boot button while you apply power to force it to boot from the SD card, then re-flash as above. This is very rarely needed.
You don't need to re-flash to update FPP. FPP and OS updates work in place on the eMMC; see Updating. Re-flashing is only for a clean start or recovery.
The PocketBeagle 2's buttons
The PocketBeagle 2 has two small buttons of its own, side by side, separate from the buttons on the cape. They aren't labelled on the board:
| Button | Where | What it does |
|---|---|---|
| Power | the one nearest the board edge and the PocketBeagle's LEDs | Holding it down turns the PocketBeagle 2 off. Don't hold it by accident; to turn off cleanly, use FPP's Shutdown instead. |
| Boot | the one beside it, further from the edge | Only read at power-on. Hold it while you apply power to change where the board boots from (below). |
What the boot button does depends on the model:
| Normal power-on | Boot button held at power-on | |
|---|---|---|
| PocketBeagle 2 Industrial | boots from the eMMC. The bootloader there then switches to an SD card if a valid one is inserted. | boots straight from the SD card, skipping the eMMC. Use this to recover a damaged eMMC. |
| PocketBeagle 2 (regular) | boots from the SD card | also boots from the SD card. The button only changes the fallback the chip tries if the card can't be read, so it has no practical use. |
Using the boot button as an input
The boot button only affects booting at power-on, so once FPP is running you can use it as a spare
push button. Starting with FPP 10.4, it appears in FPP's GPIO Inputs as BOOT. Set it up
like any other input to start a playlist, run a command or trigger an effect. See
GPIO Inputs in the FPP manual.
Pressing it while the controller is running is safe: it doesn't reboot or change anything until the next power-on.
Powering
The PB2 is powered from the cape, through its power terminal (see Power).
USB-C
Don't use the PB2's USB-C port to power the controller. USB-C powers only the PocketBeagle 2 itself, not the cape's Ethernet, USB ports or outputs. You can still connect it to a computer for setup (USB tethering), except on the K40D-PB, where that can damage the board.